
Orbitus Robotics
Move objects and use the editor controls
Musimotion · 2D and volumetric guide
November 20, 2026 · Development preview
Open a presentation in 2D. The Mac examples use two synthetic presentations. One has a pink Orb under the word “Musimotion.” The other has an arrow in front of a WELCOME banner. The landscape iPad example shows the transport and tracks. Select a picture to see the controls at full size.
Select and move an object
- Click or tap the body of the object. The blue handles show which object you picked. If a brush is active, choose Done Painting first. If the whole canvas moves, select the hand control, Stop moving canvas.
- Drag from inside the selected object and release at its new position. The corner handles resize it and the handle above it rotates it. To undo the last move, choose Undo.
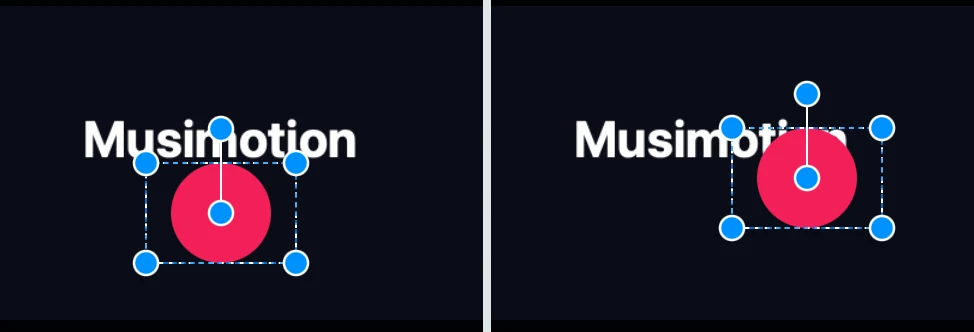
Mac, before and after the drag. Follow the blue handles around the Orb and use the title as a landmark.
In the 3D Volume camera preview, scrub to a time when the object is visible, then drag its body. The object moves across the viewing plane at its original depth. To move it toward or away from the camera, edit Depth in the Inspector. Press and hold the stationary object when you want its menu.
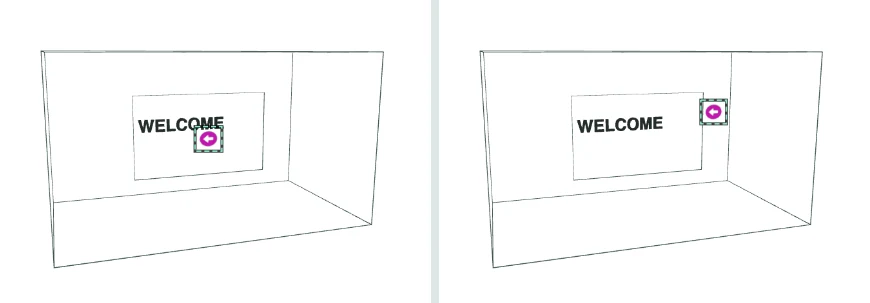
Mac, before and after dragging the magenta arrow. The banner and the wireframe box stay in place.
Spin the object menu
- Press and hold the object until the four illustrated quadrants appear. On Mac, hold the primary mouse or trackpad button. Drag around the ring to turn it clockwise or counterclockwise. Release while moving to let it coast. Touch the moving ring once to stop it. When Reduce Motion is enabled, the wheel stops on release.
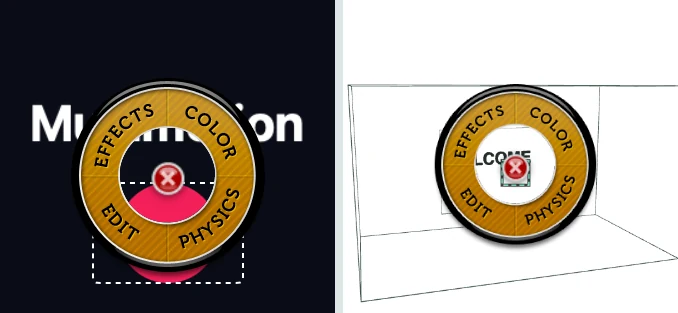
Mac. Holding the Orb in 2D (left) or the arrow in the 3D camera preview (right) opens the same wheel. Drag a quadrant to spin it.
- When the wheel stops, select Edit in its new position. Choose an action such as Copy. To return to the canvas, choose the center X.
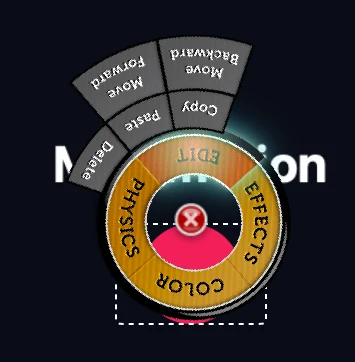
Mac. The Edit actions open beside the rotated quadrant. The center X stays in place.
Apply an effect
To animate a layer with a ready-made entrance, accent or exit, open Effects → Motion. Follow the walkthrough for presentation templates and motion presets. The Object and Celebration screenshots below show the earlier two-tab panel.
- Select an object, open Effects in the illustrated toolbar, then choose Object. Use Blur for soft focus or Clear Blur to restore sharpness. For a timed change, position the playhead and choose Fade In, Fade Out, Blur In or Blur Out. If the panel says Select an object, close it, select a visible layer and reopen Effects.
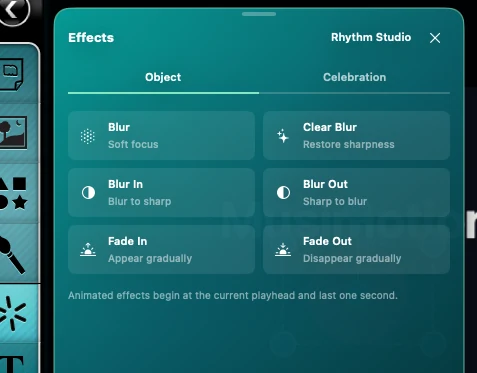
Choose an object effect from the two-column list.
- To add fireworks to the scene, choose the Celebration tab in the same panel, then Add Fireworks. The workspace switches to 3D Volume and the Effects panel stays open.
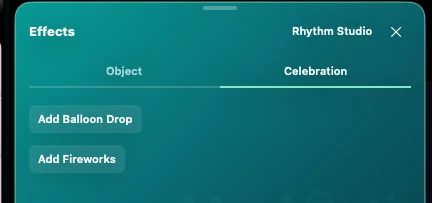
Mac. Choose an effect for the current scene.
Turn Balloon Drop, Fireworks or Confetti on or off and set Effects start. Choose Preview Surprise to play from the beginning or Show Burst to inspect the fireworks near their cue.
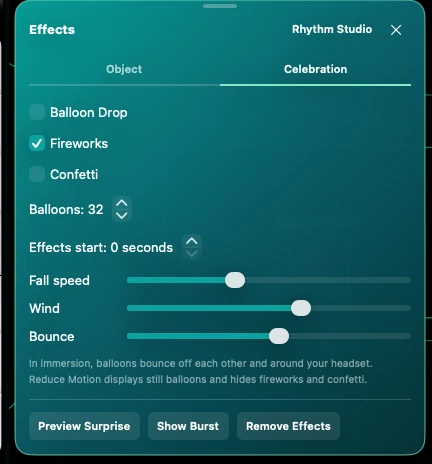
The switches belong to the scene. Remove Effects clears its celebration settings.
If Show Burst is dimmed, turn Fireworks on and leave about three seconds between Effects start and the end of the scene.

With Fireworks off, Show Burst is dimmed. Preview Surprise remains available.
Show tracks and scrub
- At the far right of the turquoise transport row, beside the red Record Keyframe button, select the small rectangle with its lower half filled. Its accessibility label is Show Timeline when the tracks are closed and Hide Timeline when they are open.

The compact toggle sits at the right end of the button row. The space above the painted Play triangle matches the space below it down to the scrubber track.
- Drag the scrubber toward the right edge to move later in the scene. Use the same icon again to give the artwork more room. Playback and scrubbing remain available in both views. The transport leaves a twelve-point inset below the slider, including its thumb, so you can reach the ends without brushing the window edge.
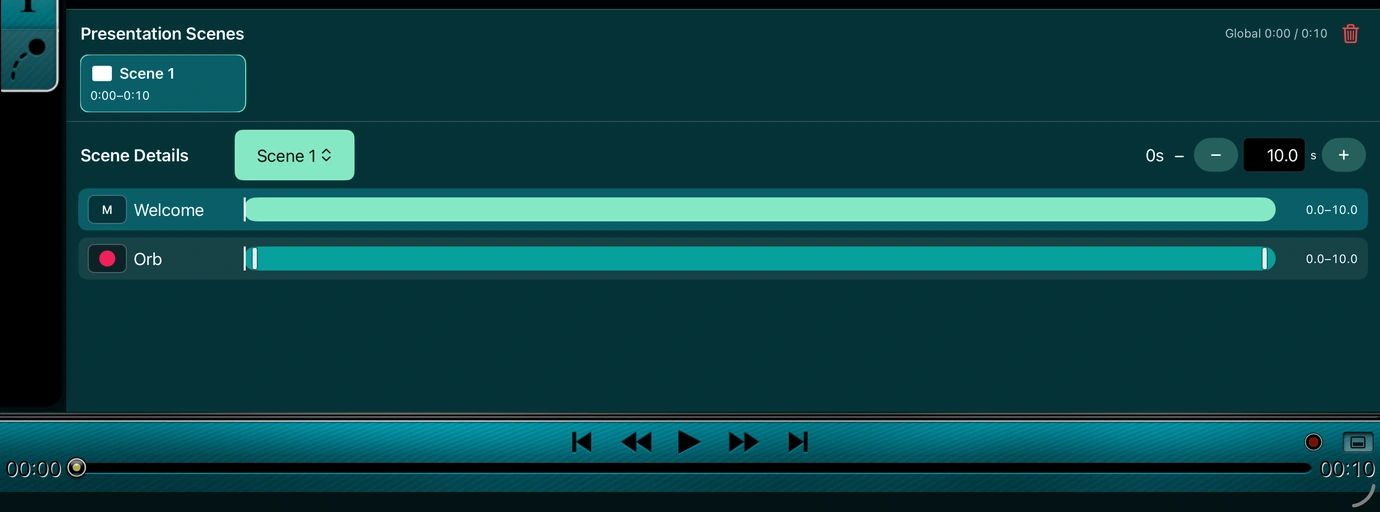
Landscape iPad simulator. The expanded timeline shows the Welcome and Orb tracks above the transport and scrubber.
To adjust when the next scene starts, select the current scene under Objects → Scenes, open Scene Timing… and enter Duration (seconds). Turn on Continue soundtrack to carry the opening music through the next cut. Extend a scene and its soundtrack.