
Orbitus Robotics
Create a presentation from a template
November 20, 2026 · Development preview for Mac, iPad and Vision Pro
Choose from fifty title and effects templates, four familiar spatial scenes and 32 editable 3D music videos. Make a title sequence, add a location stamp, paint a Sumi title to music or roll credits toward a vanishing point. The ten black dragon paintings honor the HeiLongWuShu school. Each has its own shamisen score and tempo. You can extend an opening and keep the same music playing into the next scene. The template supplies editable text, shapes and keyframes. Use the updated development preview on each device for the painted strokes and perspective lettering. The screenshots show the running app with synthetic demonstration content. The poster sheets use frames rendered from the editable projects. Select a picture to see the controls at full size.
Start with a title
- In the library, choose Create. On Mac you can also choose File → New Presentation… or press ⌘N. In the Vision Pro spatial workspace, choose Project → New Presentation….
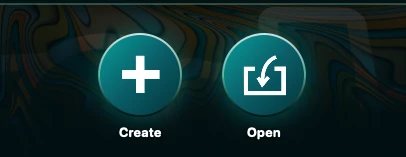
Create opens the template chooser.
- Choose Titles, then Cinematic Title. The outline marks the selected poster. Each poster shows a frame from the presentation. Choose All to browse every category. Use Search templates to find a name, category or word in its description. For example, type “crawl” to find Starfield Crawl. If you see No matching templates, choose Clear search and All. For a clean canvas choose Blank Presentation. For the familiar title and orb, select Original Canvas under All.
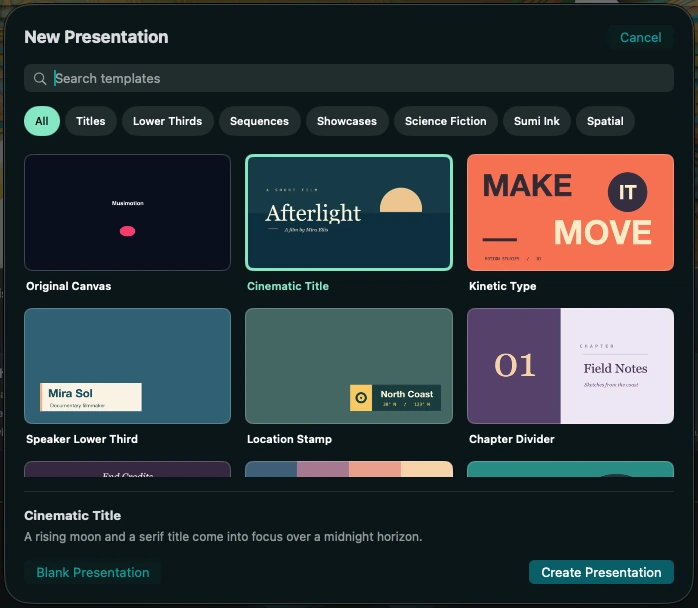
The category row filters the gallery. This earlier capture shows the chooser before the black dragon collection was added. Blank Presentation starts an empty scene.
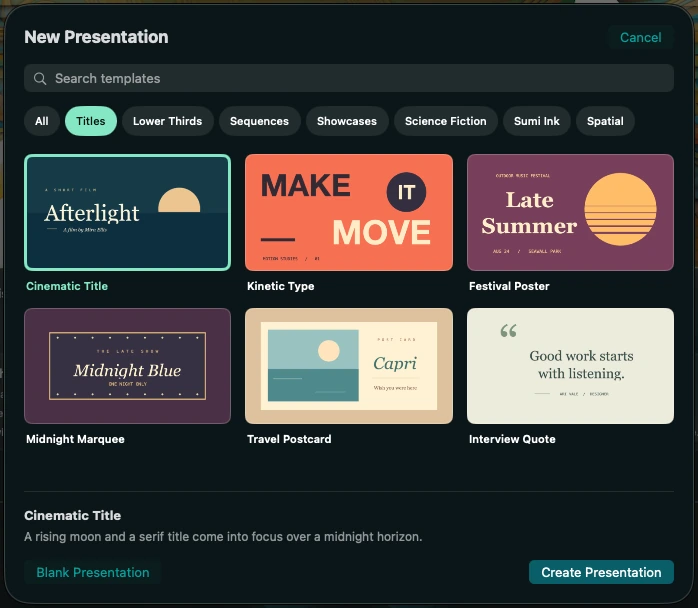
Cinematic Title is selected. Its description and the Create Presentation button sit below the posters.
- Choose Create Presentation, then scrub forward. In the Afterlight scene, the moon rises and the film title comes into focus. To change the words, open Objects, select Film title and change Text in the inspector. Play the scene to see your words follow the title’s existing motion.
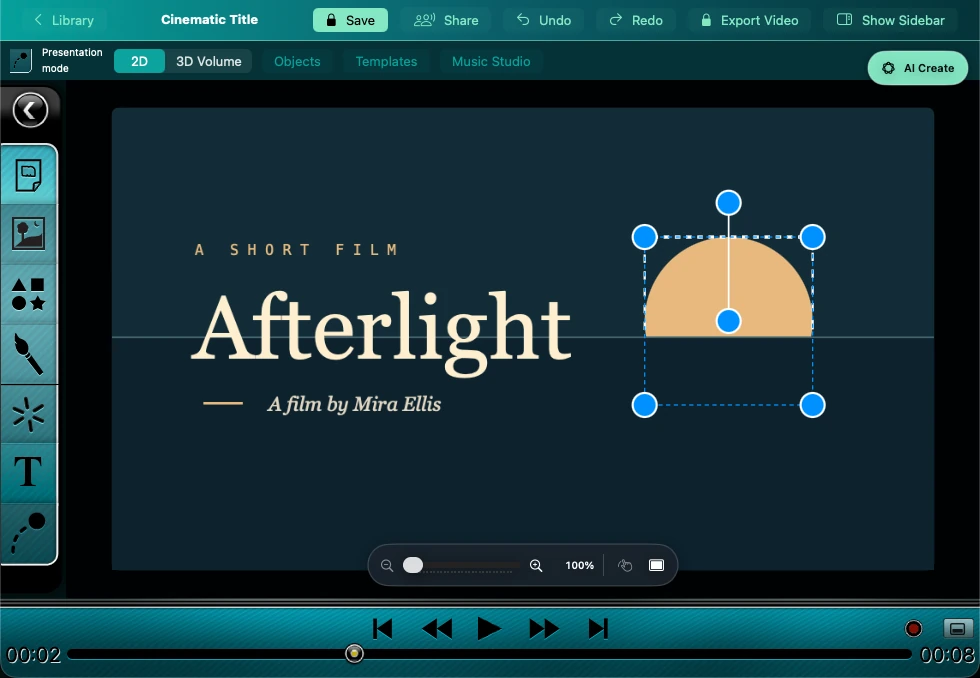
The moon, horizon, title and credits are separate layers in the editor.
- Try changing Afterlight to Northern Lights. Return to the library and reopen Cinematic Title. Select Film title again. The Name field still identifies the layer and the Text field contains the words you entered.
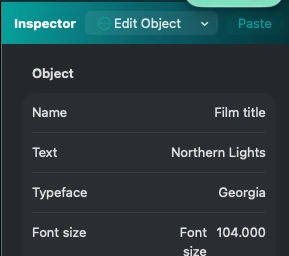
The reopened inspector shows the layer name, edited lettering and original Georgia typeface.
You can also watch the eight-second title or open the same seven-layer project. Unzip the download and open Afterlight.musimotion in the development preview. The sample movie is silent H.264 at 960 × 540 and 12 frames per second. Watch Afterlight (180 KB) · Download the editable project (2 KB) · Sample file details and checksums
Add a second scene
- With the title presentation open, choose Templates → Lower Thirds → Location Stamp. Choose Import into Presentation to append the location scene. For a separate project, choose Open as New Presentation, which saves the current work in the library before opening the template.
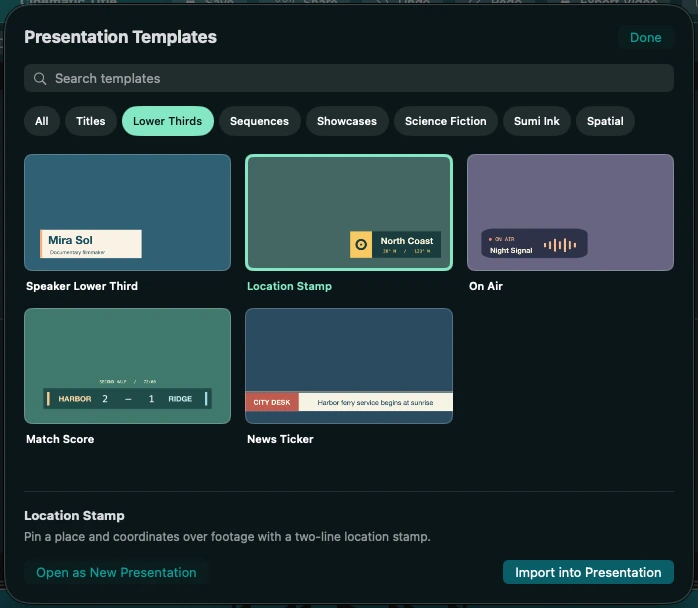
The editor’s template chooser offers both actions beneath the selected lower third.
- Play the imported scene. The location stamp settles into the lower right. Select Place name and Coordinates in Objects to change the two lines individually. Import adds a whole scene with its own background and duration. Choose Undo to remove the last import.
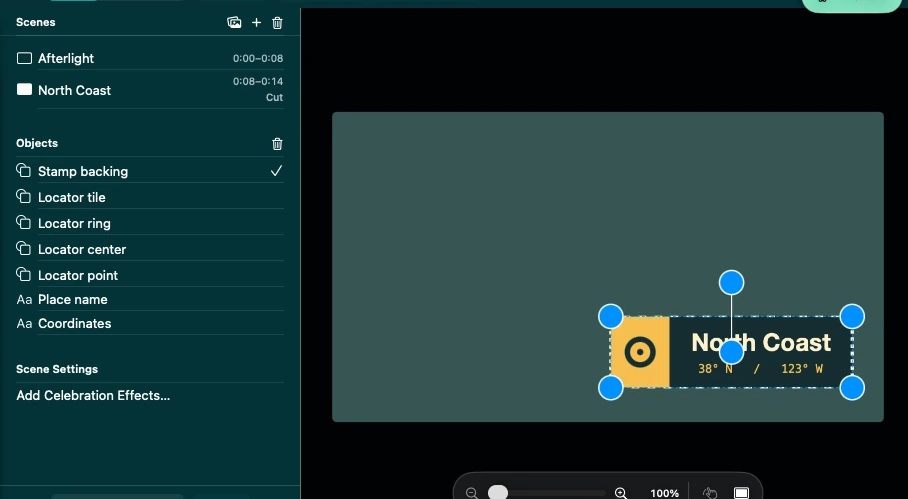
The new scene joins the title sequence. Its place name, coordinates and backing can be edited separately.
Choose a different layout
| Category | Templates | What you can change |
|---|---|---|
| Titles | Cinematic Title, Kinetic Type, Festival Poster, Midnight Marquee, Travel Postcard, Interview Quote | Change the film or event name, retime the type, or replace a quotation and its attribution. |
| Lower Thirds | Speaker Lower Third, Location Stamp, On Air, Match Score, News Ticker | Identify a speaker, label a location, update a score or change the scrolling headline. |
| Sequences | Chapter Divider, Rolling Credits, Color Wipe, Film Countdown, Split Reveal, End Slate, Milestone Timeline | Number the chapters, roll a crew list or time a countdown or reveal between scenes. |
| Showcases | Product Spotlight, Data Story, Festival Lineup, Track List, Route Map, Weather Brief, Color Study, Recipe Card, Property Feature | Change the values and bar widths in a chart, an album sleeve and track list, or the details in a recipe or property card. |
| Science Fiction | Starfield Crawl, Orbital Credits, First Contact, Mission Debrief, Jump to Orbit, Signal Lost | Replace the prologue or credits, change a readout and keep the text moving to the score. |
| Sumi Ink | Circle of Breath, Bamboo in Rain, Tide Ledger, Plum Blossom, Blue Mountain, Reeds at Dusk | Edit the title, replay painted strokes on paper and time the scene to its original score. |
| Black Dragons | Ten HeiLongWuShu tribute paintings, from The Ink Gate to Dawn Homecoming | Replay brush gestures, edit the dedication or choose a painting by its shamisen tempo. |
| Spatial | Depth Gallery, Welcome Banner, Birthday Surprise, Rhythm Stage, Droid Arena | Scrub XYZ motion in Depth Gallery or open one of the four familiar spatial scenes. |
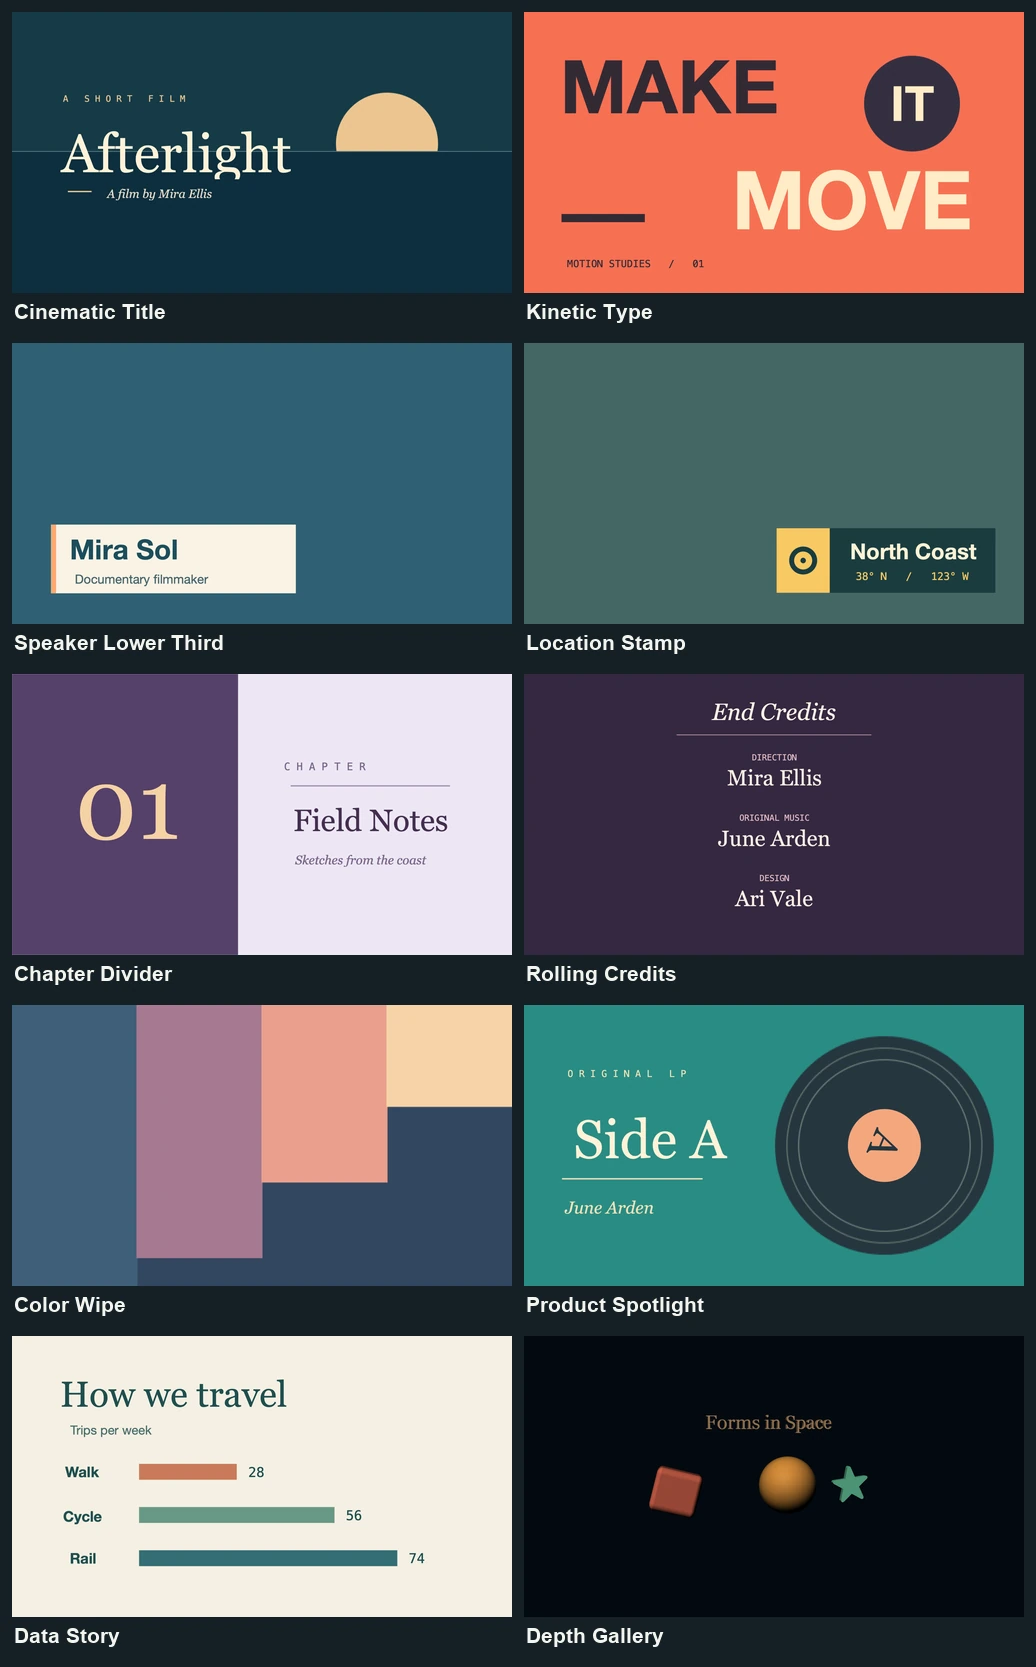
The first ten designs, read in pairs from the top. The film and location cards use sample text. The last pair shows Data Story and Depth Gallery. Depth Gallery uses the project’s saved 3D camera.
For a broadcast overlay, try On Air, Match Score or News Ticker in Lower Thirds. To open on a numbered leader, use Sequences → Film Countdown. Each numeral has its own timing.
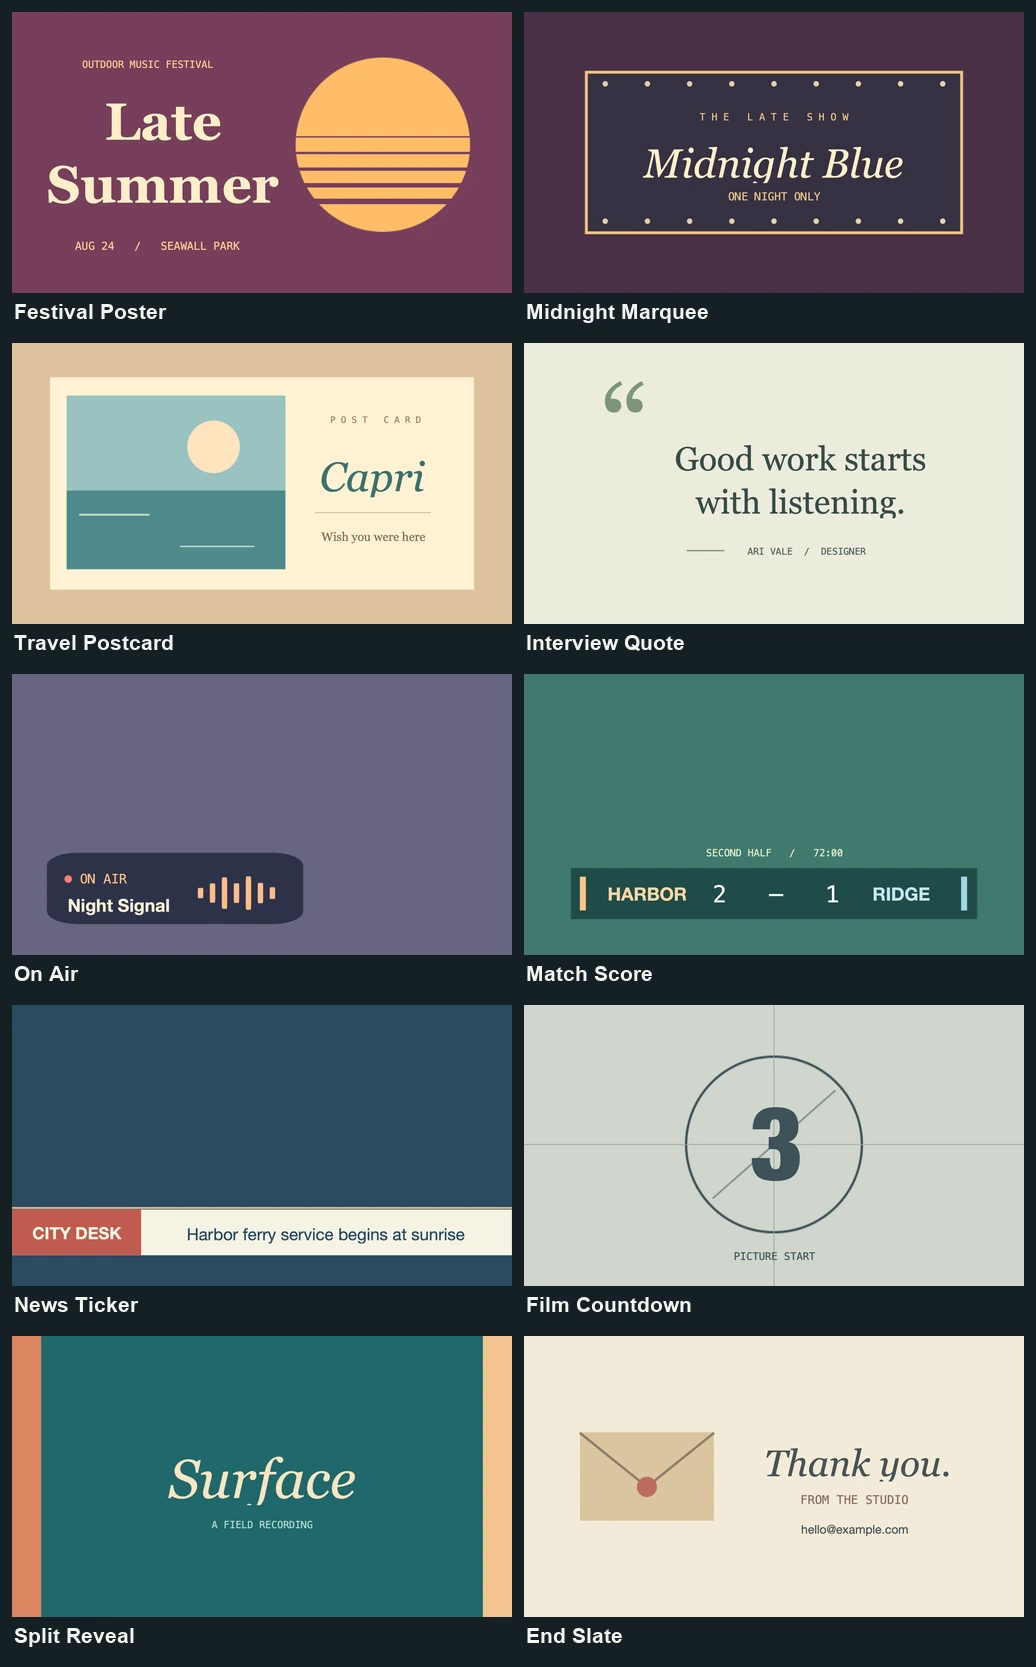
Festival Poster and Midnight Marquee open this sheet. The broadcast graphics are in the middle. Split Reveal and End Slate close the last row.
For a song list, choose Showcases → Track List. Change the track names and times in Objects, then preview the moving play marker. Sequences → Milestone Timeline lets you replace a series of dated events.
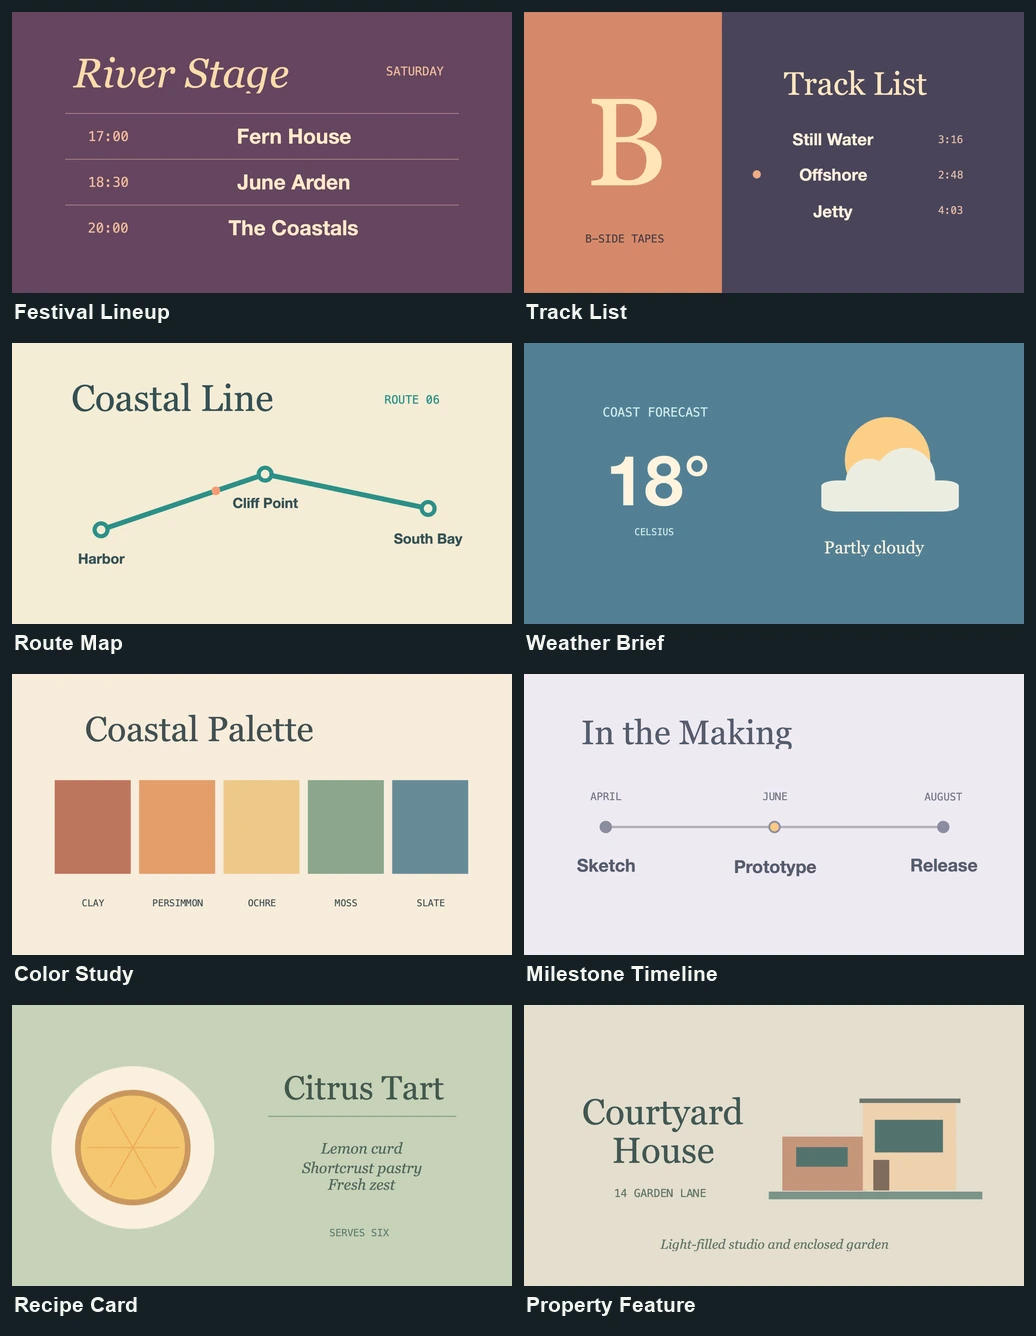
From top to bottom, the pairs show a lineup and track list, a route and weather brief, a palette and milestones, then a recipe and property feature.
Besides the six Sumi Ink and six Science Fiction scores, six other templates have their own music. Look for Festival Poster, Midnight Marquee, On Air, Film Countdown, Festival Lineup and Track List. The built-in templates synthesize their scores locally and place them on editable audio tracks.
Animate one layer
- In a scene, select a visible layer and move the playhead to the moment its motion should begin. Open Effects → Motion in the artwork editor. In Vision Pro’s 3D Setup workspace, choose Effects → Motion Presets. Choose Entrance, Accent or Exit from the group menu, then set Duration to 0.5 s, 1 s or 2 s. Click a preset to apply it immediately.
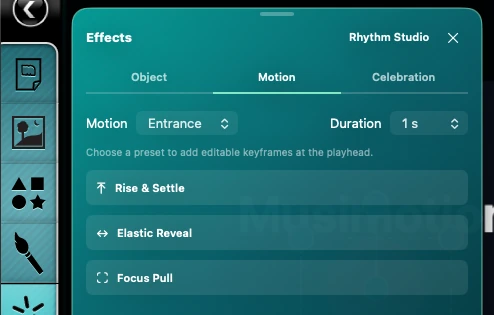
Rise & Settle moves the selected layer upward, lets it overshoot slightly and brings it to rest.
| Group | Preset | Motion |
|---|---|---|
| Entrance | Rise & Settle, Elastic Reveal, Focus Pull | Rise and land, stretch open horizontally, or sharpen from soft focus. |
| Accent | Heartbeat, Pendulum, Orbit | Pulse twice, rock side to side, or travel a loop and return. |
| Exit | Sweep Away, Fold Down, Tumble Out | Fade to the right, collapse vertically, or turn and shrink while falling. |
In 3D Volume, a blur keyframe makes Musimotion draw text or a shape on a flat surface at that layer’s animated depth. For a solid shape that keeps its thickness, use a transform preset such as Rise & Settle or Pendulum.
- Read the time range under the menus and choose Play from Start to see the result. On Vision Pro, previewing from 3D Setup returns you to the artwork editor and starts playback. The range uses seconds from the start of the current scene. If the layer ends early, Musimotion fits the preset into its remaining time. Each application adds ordinary layer keyframes to the project. In the inspector, open Keyframes and choose a timestamp. Adjust a property such as Rotation or Opacity at that pose, then play again. Undo immediately after applying a preset removes the entire application in one step.
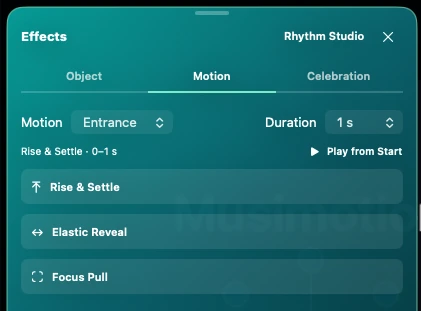
The applied preset shows its name, actual time range and playback control.
- If the presets are dimmed, select a visual layer and move the playhead inside its visible span. Leave at least one frame before its end. The panel then enables the presets. Audio tracks can be timed in the timeline.
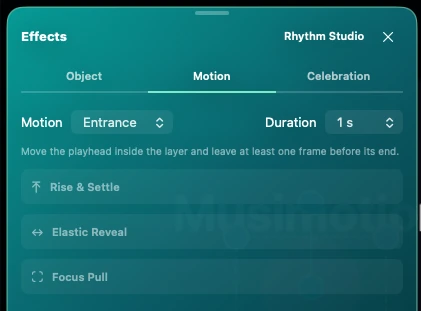
At the end of the layer the panel explains where to move the playhead.
Paint a title to music
- Choose Create → Sumi Ink → Circle of Breath → Create Presentation. Choose Go to Start and Play. A dark round stroke begins the circle. A finer dry-brush stroke joins on the third beat, while the opening line and title appear on the paper.
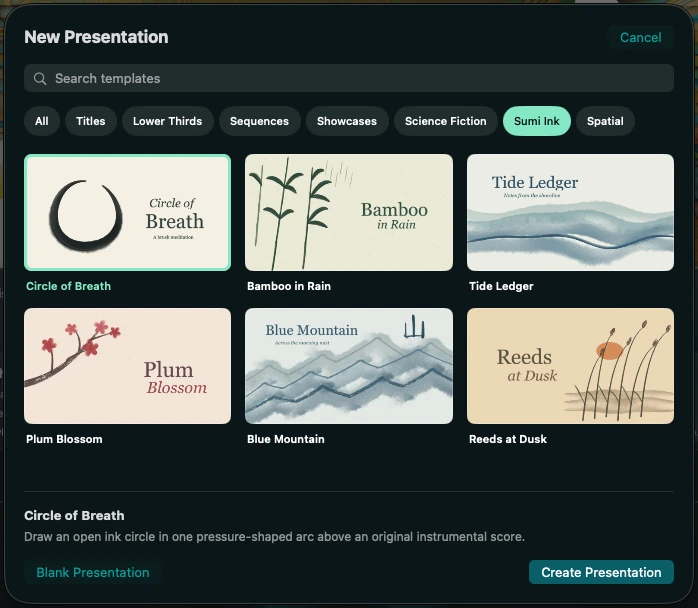
The Sumi Ink category includes circle, bamboo, tide, blossom, mountain and reed studies. Choosing a poster shows its description.
- Open Objects and select Title to replace “Breath”. Opening line and Subtitle are separate text layers. To change the paint, select a Live Paint stroke. Increase Water for a softer edge, change Ink Load for denser or lighter pigment, then scrub across the entrance to see the change. If the first frame looks empty, advance the playhead.
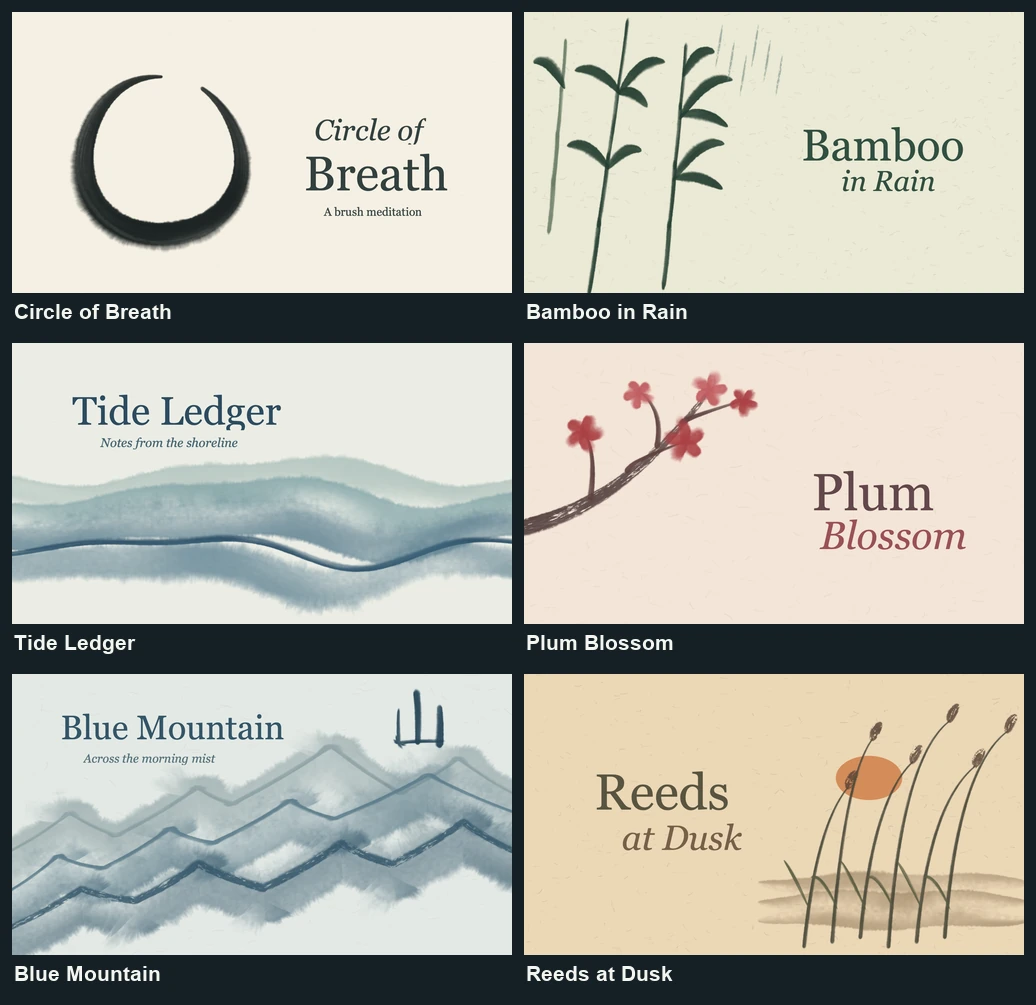
Top to bottom, the pairs show Circle of Breath and Bamboo in Rain, Tide Ledger and Plum Blossom, then Blue Mountain and Reeds at Dusk. In Blue Mountain the character 山 (mountain) is painted in three strokes over the ridge. Play from three seconds to see their order. Each picture is a rendered frame from its own project.
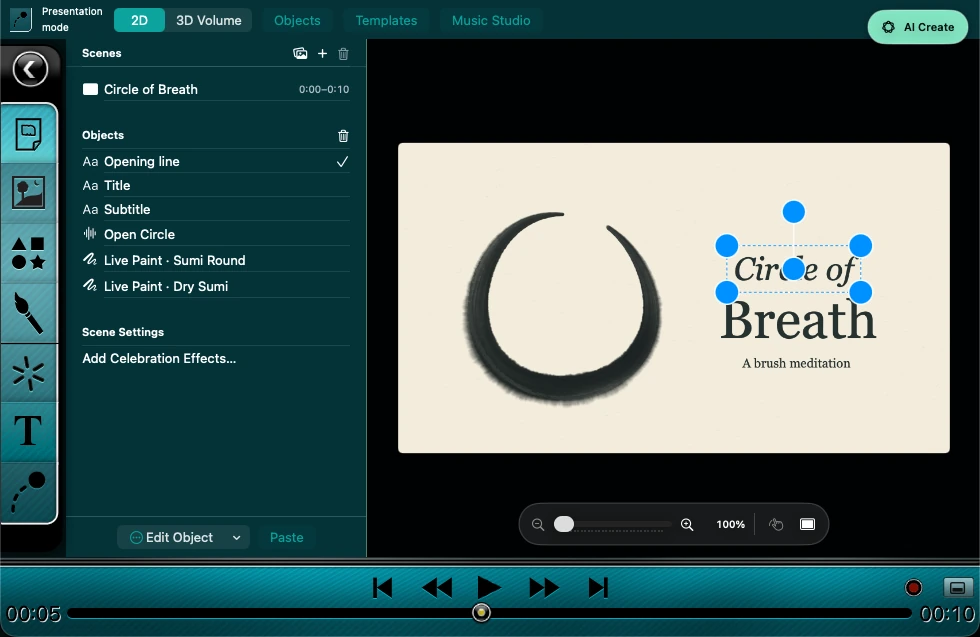
Objects exposes the native layers, individual brush gestures and Open Circle audio track. Select Live Paint · Sumi Round to edit the first stroke.
- In the timeline, select the Open Circle audio track. The original chamber score plays at 68 BPM over three bars. Mute the track to compare the motion in silence, then unmute it and replay. The drawing times and the score travel in the same presentation package.
At the requested 5.2-second frame in the native movie, the dark round stroke, dry-brush accent and title are visible on the rice paper. View the full-size frame.
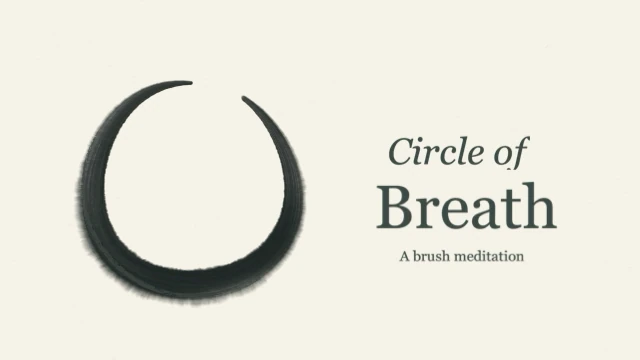
Play the native export, or unzip the editable project and open Circle of Breath.musimotion. Its audio lane uses AAC to keep the download compact. Watch the eleven-second native movie (305 KB) · Download the editable project (138 KB) · Sample file details and checksums
Send credits into a starfield
- Choose Create → Science Fiction → Starfield Crawl → Create Presentation. Play the scene from the beginning. The chapter and title enter from the lower edge, followed by the prologue lines. As each line moves toward the horizon, its letters narrow and its vertical spacing contracts. The last line carries the closing credit.
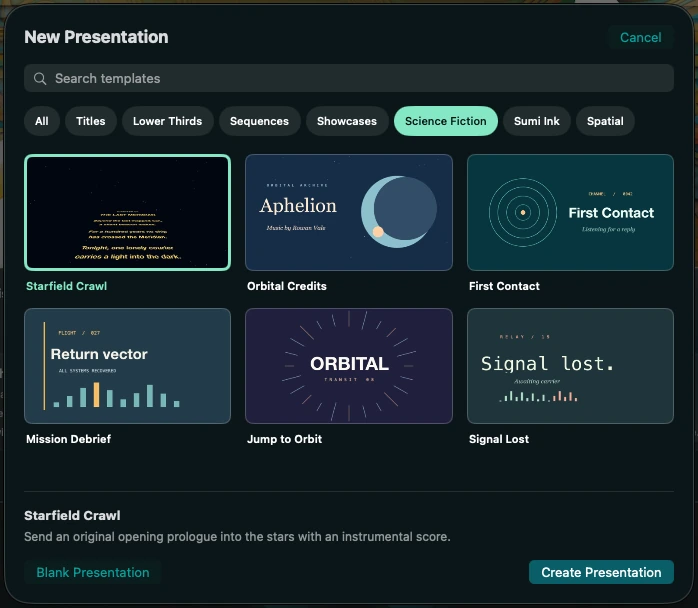
The Science Fiction category offers the opening crawl, orbital credits, experiments in communication, a mission report, departure and transmission endings.
- Open Objects, select Story title and replace “THE LAST MERIDIAN” in Text. Select Story line 1 through Story line 6 for the prologue and Closing credit for the filmmaker’s name. Each line has its own entrance. In the text inspector, Crawl taper (%) adjusts the narrowing within the letters. The template starts at 7.5%. Its keyframes control how the entire line recedes over time. Scrub forward to see a later line before trying to select it on the canvas.
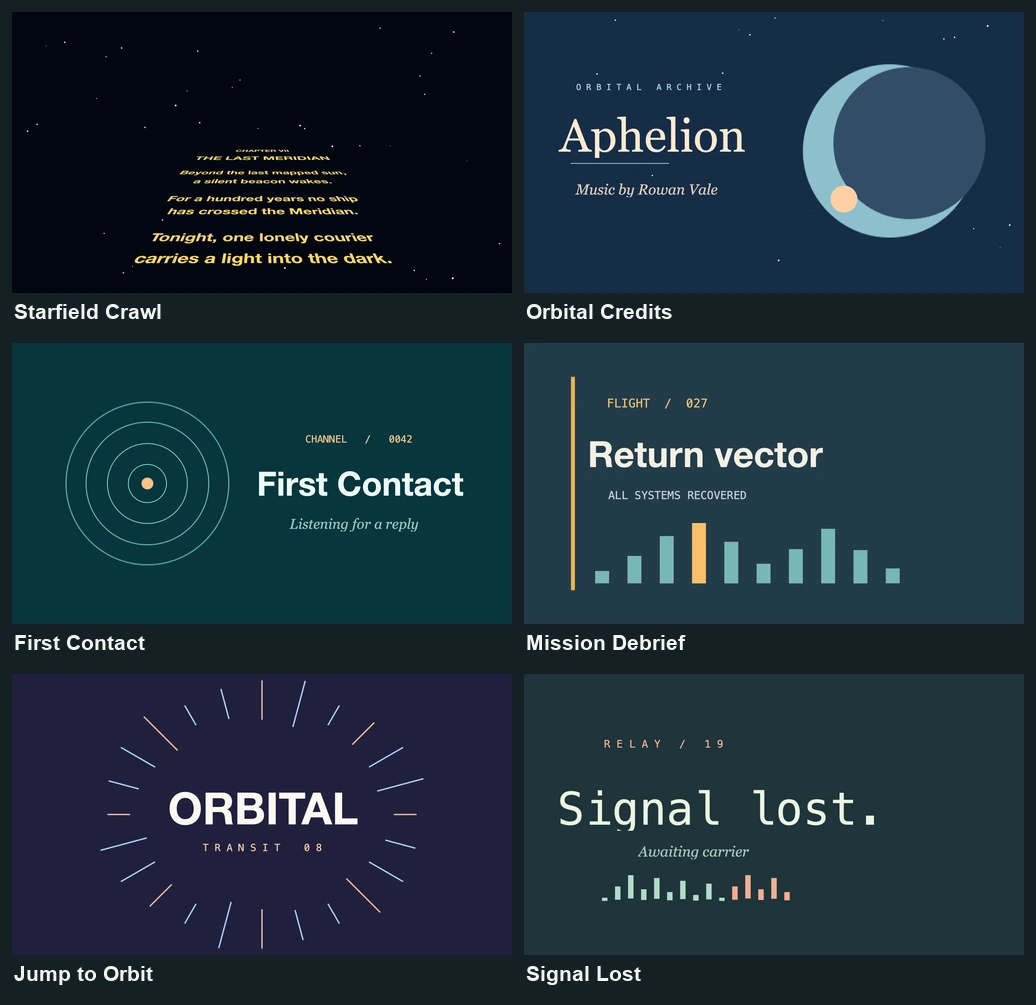
The top pair shows Starfield Crawl and Orbital Credits. First Contact and Mission Debrief occupy the middle row. Jump to Orbit and Signal Lost finish the sheet.
- Choose Go to Start and play the crawl with Beyond the Meridian, an original 80 BPM chamber score. To hear just a section, move the playhead to that part of the timeline and press Play. Save the project to retain the lettering, motion and score for later editing.
Eight seconds into the native movie, the prologue advances from the bottom edge toward the opening title at the horizon. View the full-size frame.
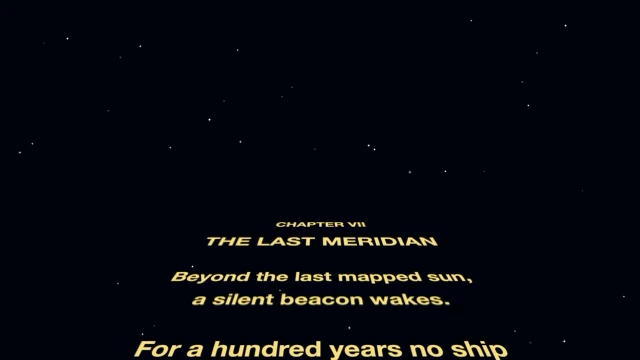
Play the web preview of the native export, or unzip the editable project and open Starfield Crawl.musimotion. Its audio lane uses AAC to keep the download compact. Watch the twenty-two-second web preview (878 KB) · Download the editable project (304 KB) · Sample file details and checksums
Paint a black dragon
Ten Sumi ink paintings honor the HeiLongWuShu school. Each unfolds to four bars of original shamisen music. For a quiet opening, Lotus Stillness takes 16 seconds at 60 beats per minute (BPM). For a brisk finish, Dawn Homecoming covers the same four bars in just over seven seconds at 136 BPM.
- Choose Create → Black Dragons → The Ink Gate → Create Presentation. If you already have a project open, choose Templates → Black Dragons → The Ink Gate → Import into Presentation to add the painting as a scene. To find the collection from All, enter “HeiLongWuShu” or “shamizan” in Search templates.
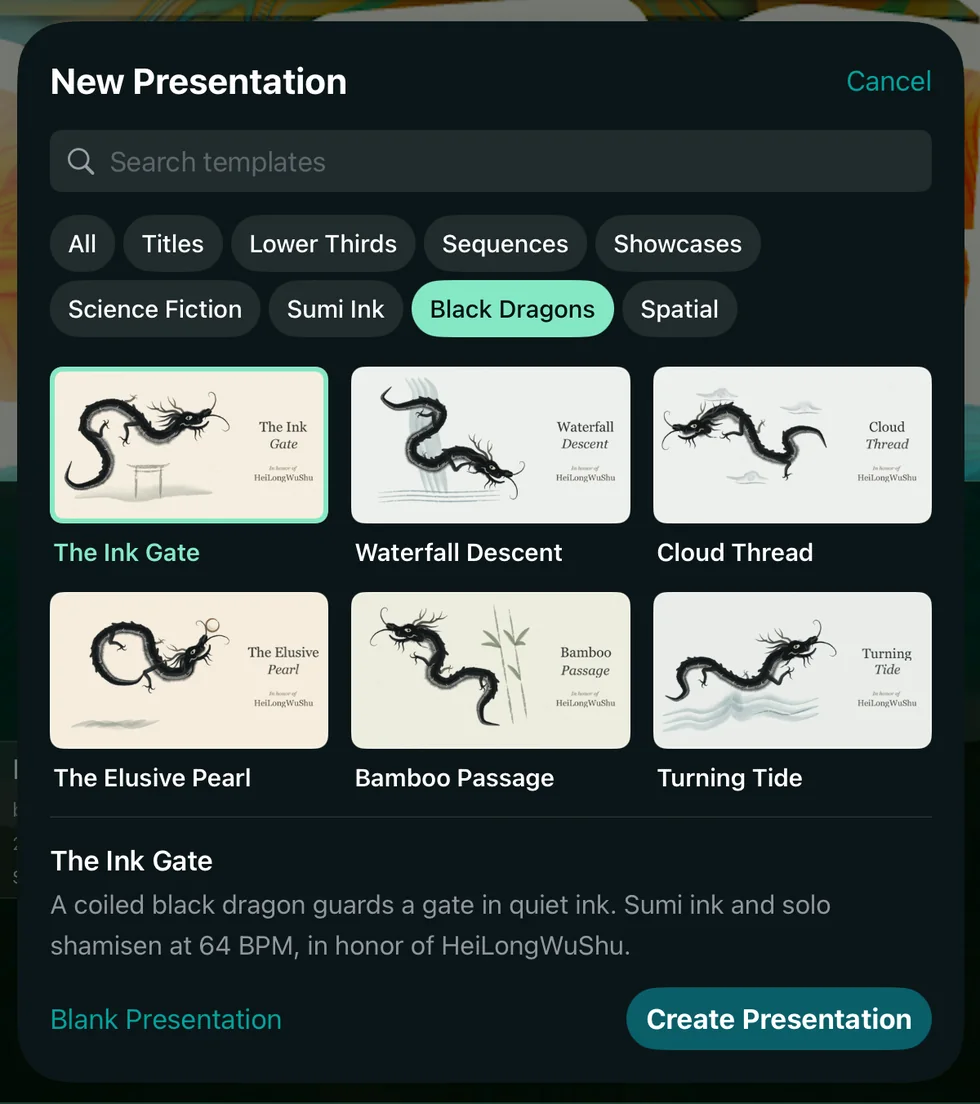
The Black Dragons chooser on the iPad simulator. Choose a poster to preview the painting before creating or importing its scene.
- Choose Go to Start, then Play. Hear the shamisen pulse at 64 BPM while the painting appears. Drag the timeline forward to see the finished dragon. To compare tempos, open Templates and try another painting from the table.
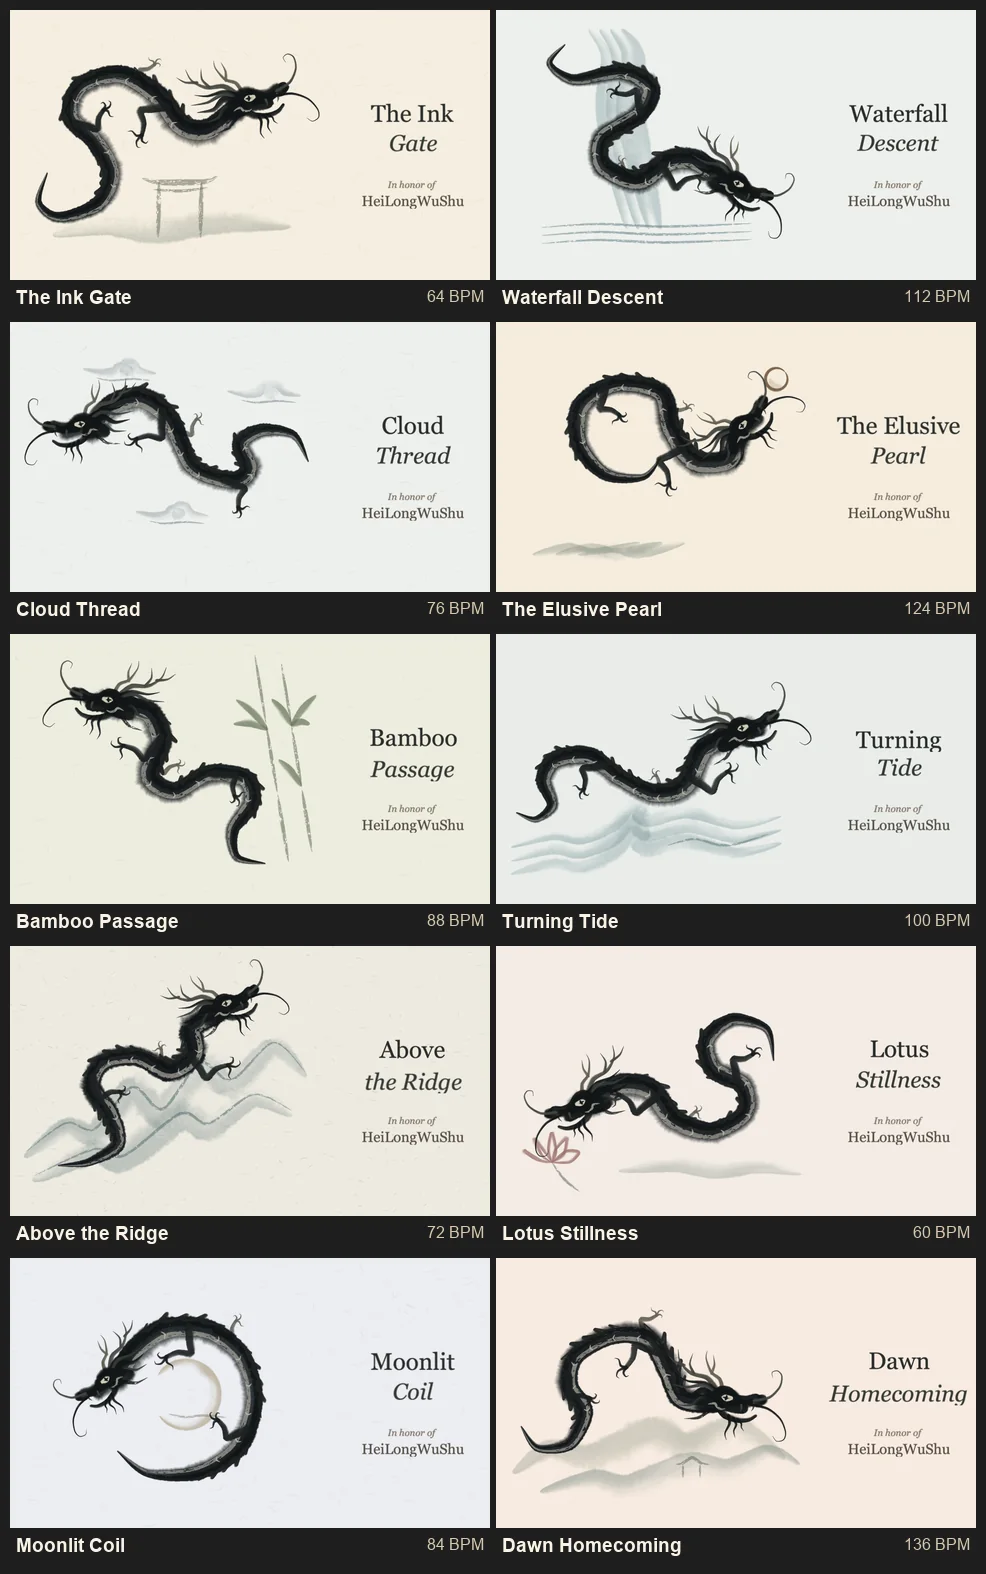
Read each row from left to right in the order listed below. The Ink Gate coils over a timber gate, Waterfall Descent follows the falling wash, and Moonlit Coil curves around a pale crescent. Select the sheet for a close look at the horns, whiskers and claws.
| Painting | Ink motif | Shamisen tempo |
|---|---|---|
| The Ink Gate | A timber gate | 64 BPM |
| Waterfall Descent | Long waterfall washes | 112 BPM |
| Cloud Thread | Three curls of cloud | 76 BPM |
| The Elusive Pearl | An outlined pearl | 124 BPM |
| Bamboo Passage | Segmented bamboo and brush leaves | 88 BPM |
| Turning Tide | Three wave crests | 100 BPM |
| Above the Ridge | Two mountain ridges | 72 BPM |
| Lotus Stillness | A lotus above still water | 60 BPM |
| Moonlit Coil | A pale crescent moon | 84 BPM |
| Dawn Homecoming | A distant pavilion | 136 BPM |
The tempo comparison, 15-second movie and downloadable project below preserve the earlier embedded recordings. A newly created Black Dragons presentation uses the revised shamisen performance. Hear both versions of The Ink Gate.
Hear the first two bars of Lotus Stillness at 60 BPM. After a short pause, Dawn Homecoming plays two bars at 136 BPM. The second excerpt starts about eight and a half seconds in.
Listen to the tempo comparison.
- Open Objects. Select Dedication to edit the school name or Credit line to edit “In honor of”. Title and Second line control the two lines of title lettering. Select a Live Paint stroke to adjust Water or Ink Load. Select The Ink Gate · Shamisen to find the score. Choose Go to Start and Play to review your edits, then choose Save.
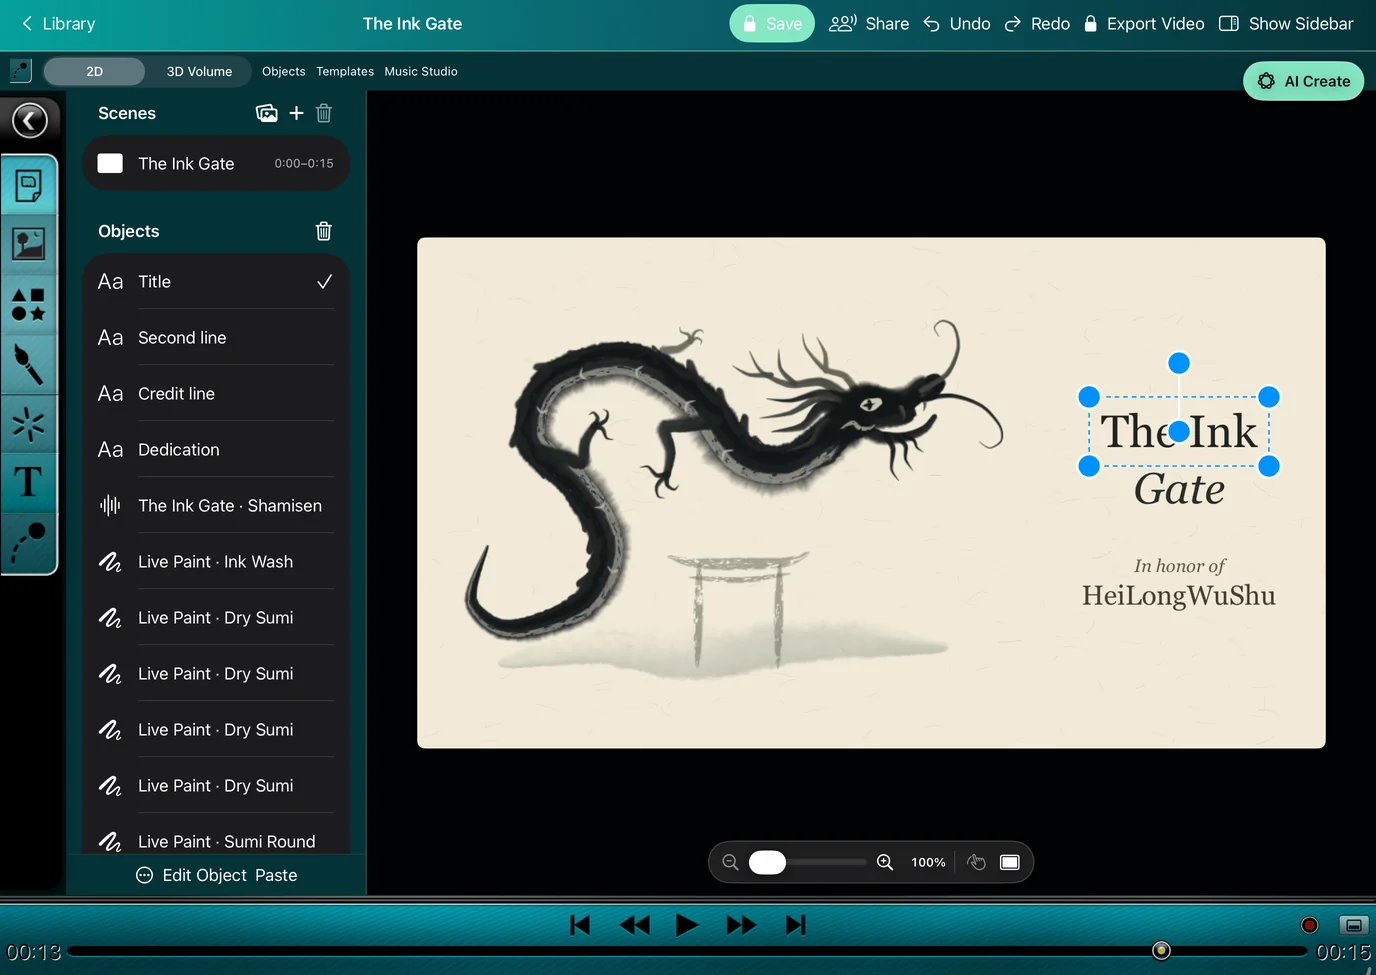
The iPad simulator shows the running project with Objects open. Scrub into the scene if the first frame is still blank.
To audition a new recording for the existing opening, follow Hear and replace a Musimotion score.
To compose a different accompaniment, choose Go to Start → Music Studio. Select Shamisen, set Tempo and 4 bars, then choose Generate Music. Preview the take before choosing Add to Scene. In the timeline, use Mute Audio Track on the original score to hear the new track by itself.
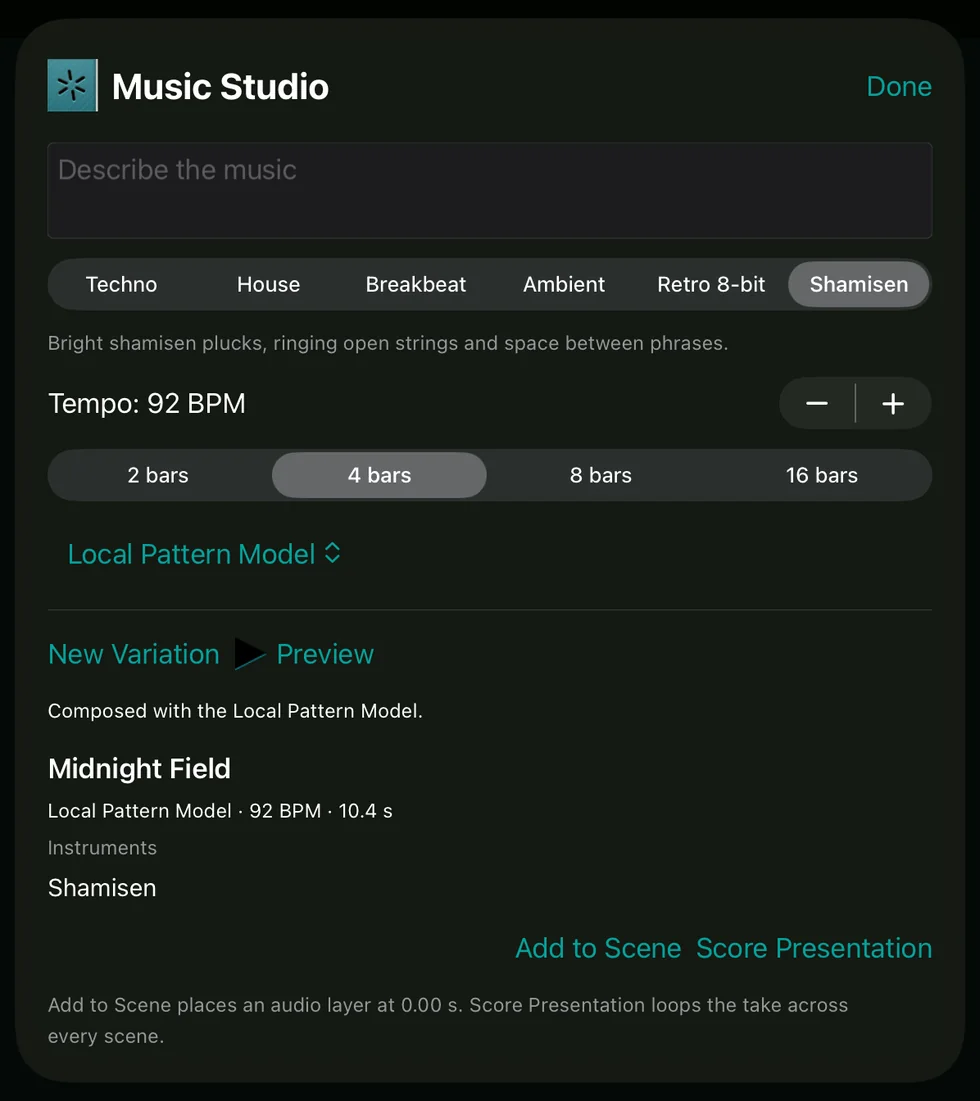
The iPad simulator shows a generated take ready to Preview at 92 BPM. Choose New Variation to hear a different phrase at the same tempo.
The completed dragon at 14 seconds. View the full-size movie frame.
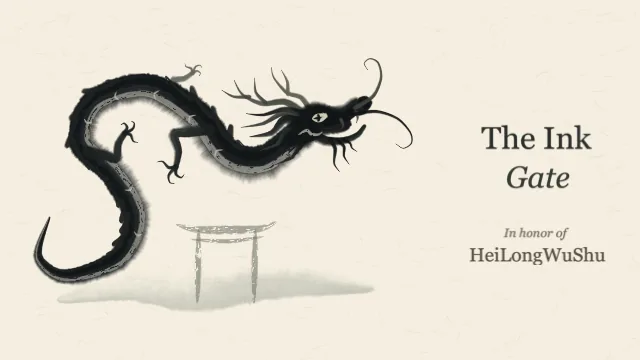
Watch the painting complete in 15 seconds. To edit the same dragon, unzip the project and open The Ink Gate.musimotion in the development preview. Watch the scored movie (230 KB) · Download the editable project (210 KB) · Sample details and checksums · Capture details · Black dragon release notes
Extend a scene and its soundtrack
The Ink Gate paints its dragon over a four-bar shamisen phrase. At 64 BPM, that phrase lasts 15 seconds. Give the dedication another 7.5 seconds on screen and choose whether the music continues under it.
- Open The Ink Gate, choose Objects, then select the opening scene under Scenes. Choose Scene Timing…. In the Vision Pro spatial workspace, select the scene and choose Project → Scene Timing….
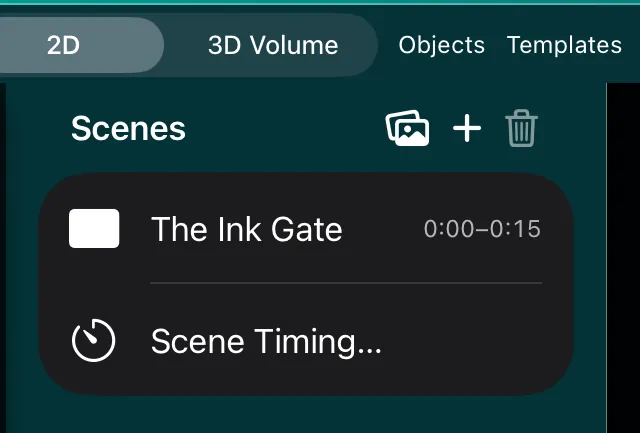
The Scenes list shows the opening ends at 15 seconds. Choose the timer just below its name.
- Enter 22.5 in Duration (seconds). Choose Apply to change just the scene length. The finished painting now holds until 22.5 seconds. Its brushstrokes and title keyframes still run at their original pace. With Continue soundtrack off, the shamisen finishes at 15 seconds.
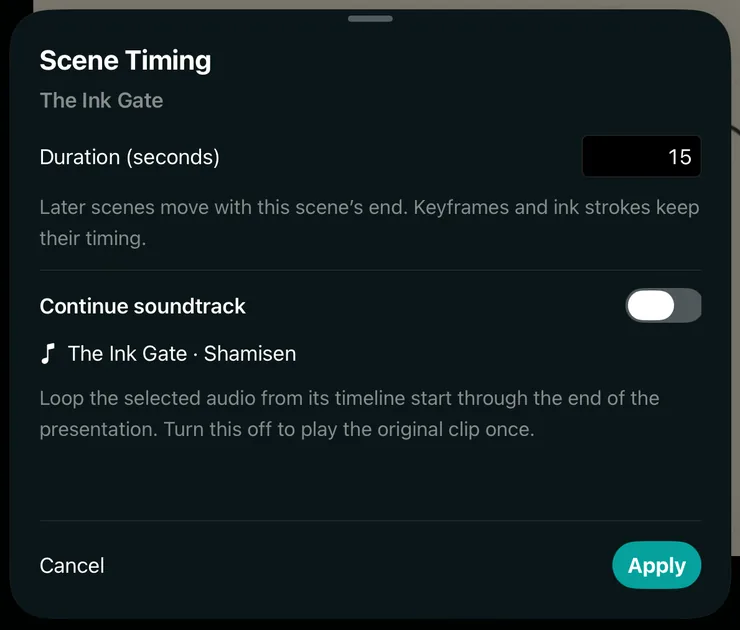
The iPad simulator shows the opening at its original 15 seconds, with the soundtrack set to play once. Replace 15 with 22.5 to hold the dedication for another two bars.
- To fill that extra time, open Scene Timing… again. Turn on Continue soundtrack, check the track name The Ink Gate · Shamisen, then choose Apply. If the project has several audio tracks, choose one from Track. The phrase repeats from its beginning at 15 seconds. If you used a trimmed audio clip, its selected portion repeats.
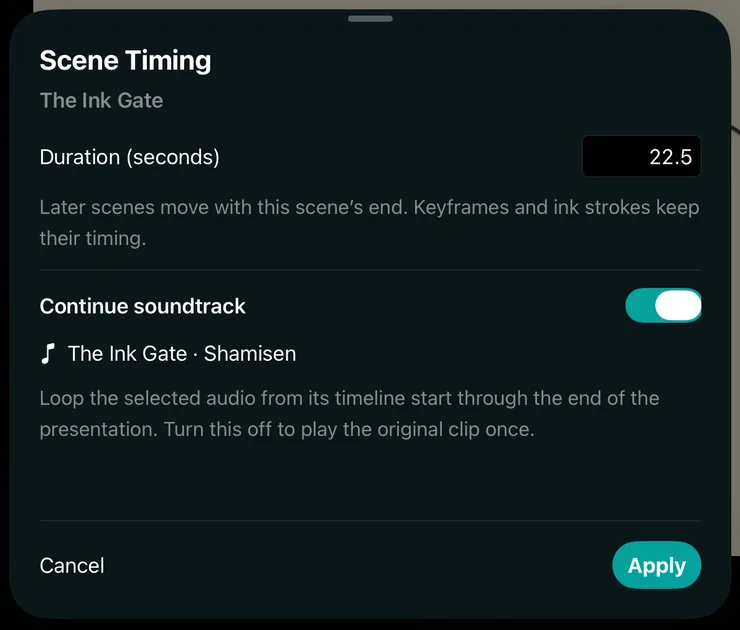
The iPad simulator shows 22.5 seconds and the switch on. Choose Apply to keep the named track playing after the original four bars.
- Choose Templates → Lower Thirds → Location Stamp → Import into Presentation to add a scene. Start playback shortly before the cut at 22.5 seconds. You will hear the phrase carry on halfway through its second pass as the location appears. Adding another scene or changing its duration moves the end of the music automatically. Save the project to keep this choice. The movie export uses the same timing. Share the exported movie with viewers using an earlier version of Musimotion so they hear the continued score. Earlier editors play the original clip once.
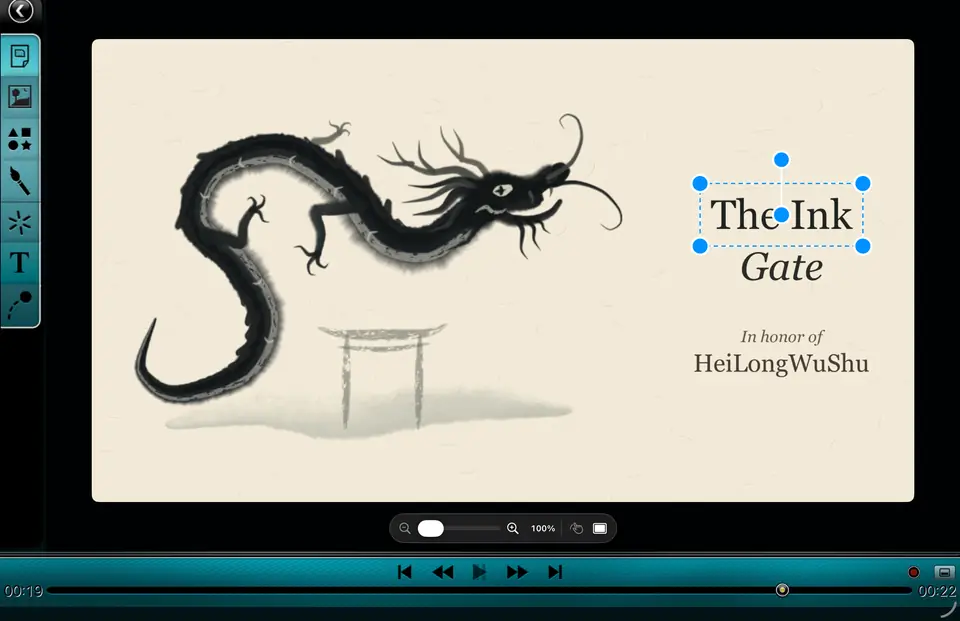
On the iPad simulator, the transport has passed 19 seconds. The dragon and dedication remain in view beyond their original 15-second opening.
In the source scene, the audio row covers the complete continuing range. A later scene shows the continuing track on its own loop row. Select that row to return to the source scene and edit its audio.
To return to a single play, turn off Continue soundtrack and choose Apply. The original audio keeps its authored start and end. If Apply is dimmed after a time edit, enter a number of at least 0.1 seconds. Shortening the scene skips anything beyond the new end. Extend it again to reveal those later events.
If the switch is dimmed because the project has no audio track, add a score with Music Studio → Generate Music → Add to Scene, then reopen Scene Timing…. If a later template brings its own music, both tracks can sound together. Use Mute Audio Track on the later score to hear only the continuing one.
Scene timing development notes · Timing screenshot details
Development release notes · Capture details · 2D and volumetric guide
Build a filmed or articulated robot tour
Choose Movie Walls to edit three moving film panels with real 2026 Orbitus footage, or choose 3D Models to animate a textured scan or an eleven-joint URDF rig. Follow the 3D model walkthrough.